Adding Employees
Add employees to your organization so they can receive perks and benefits through PerksPe.
Two Ways to Add Employees
| Method | Best for |
|---|---|
| Manual Entry | Adding a few employees one by one |
| File Upload | Adding many employees at once (bulk import) |
Method A: Manual Entry
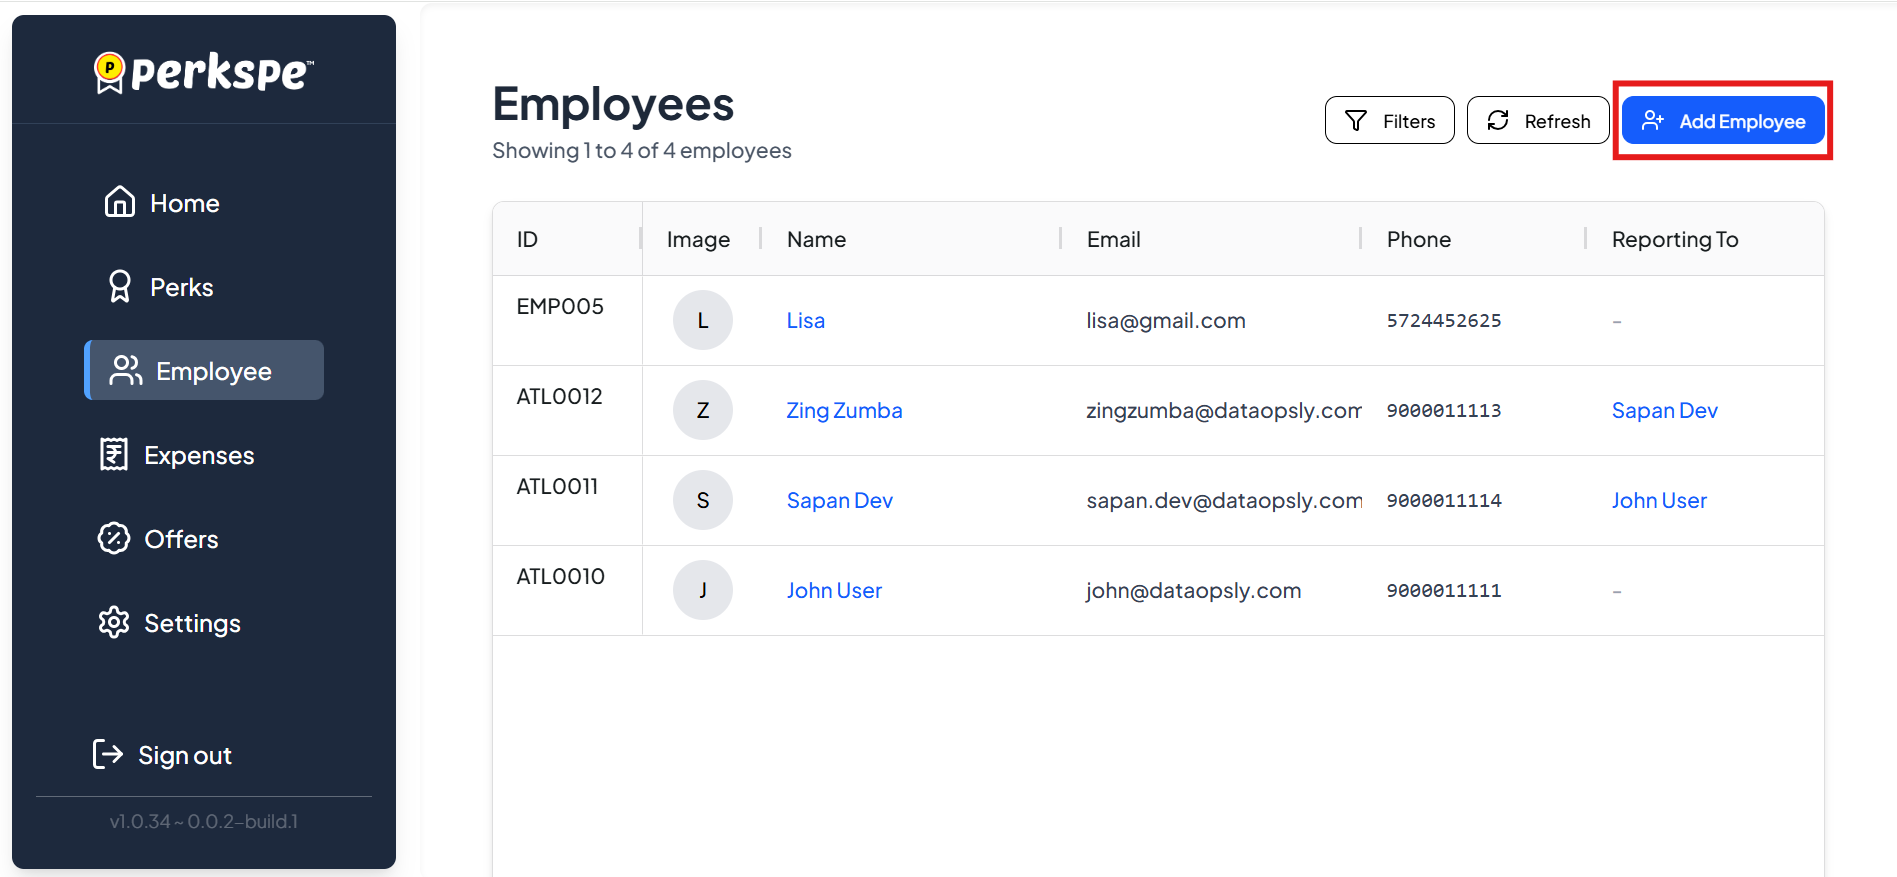
Step 1: Go to Employees
From the sidebar, click Employees.
Step 2: Click Add Employee
Click the Add Employee button (top right).
Step 3: Fill Employee Details
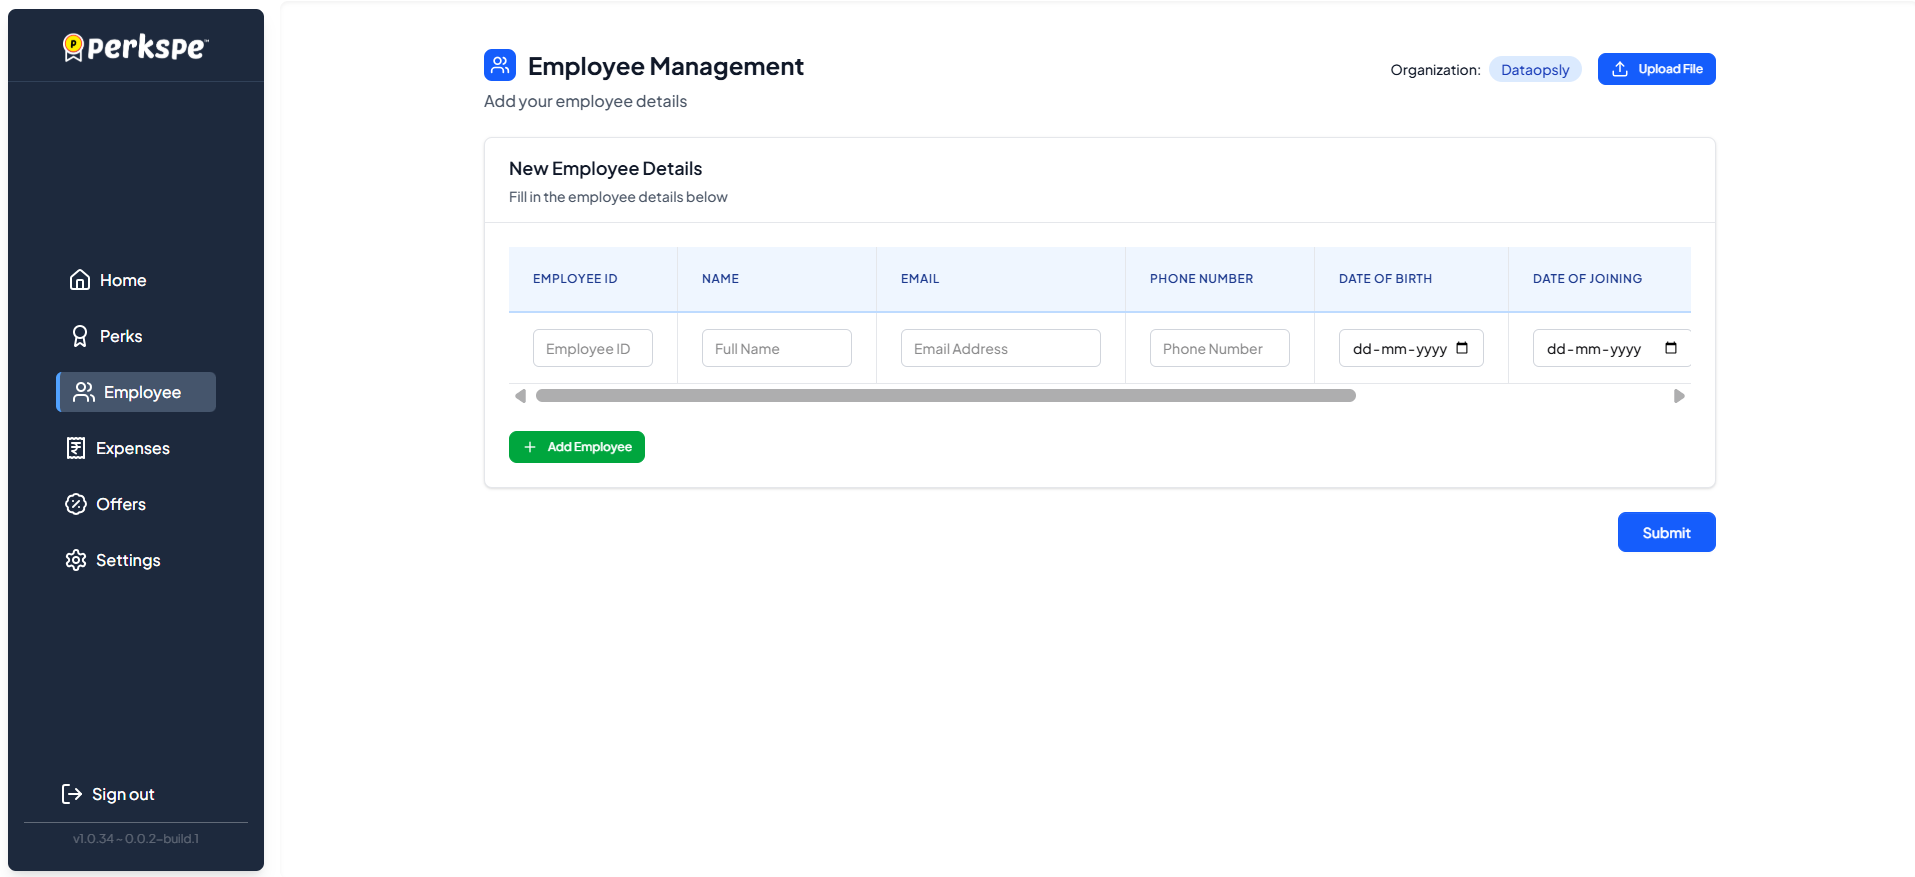
Enter the following information:
| Field | Format / Notes |
|---|---|
| Employee ID | Your internal ID for this employee |
| Full Name | Employee's complete name |
| Work email address | |
| Phone Number | Mobile number |
| Date of Birth | DD-MM-YYYY |
| Date of Joining | DD-MM-YYYY |
| PAN Number | PAN Number |
| Marital Status | Single / Married |
| Portal Access | Yes = employee can log into PerksPe portal |
Step 4: Add to List
Click the + Add Employee button to add this employee to the list.
![]()
You can add multiple employees before submitting.
Step 5: Submit
Once all employees are added, click Submit.
![]()
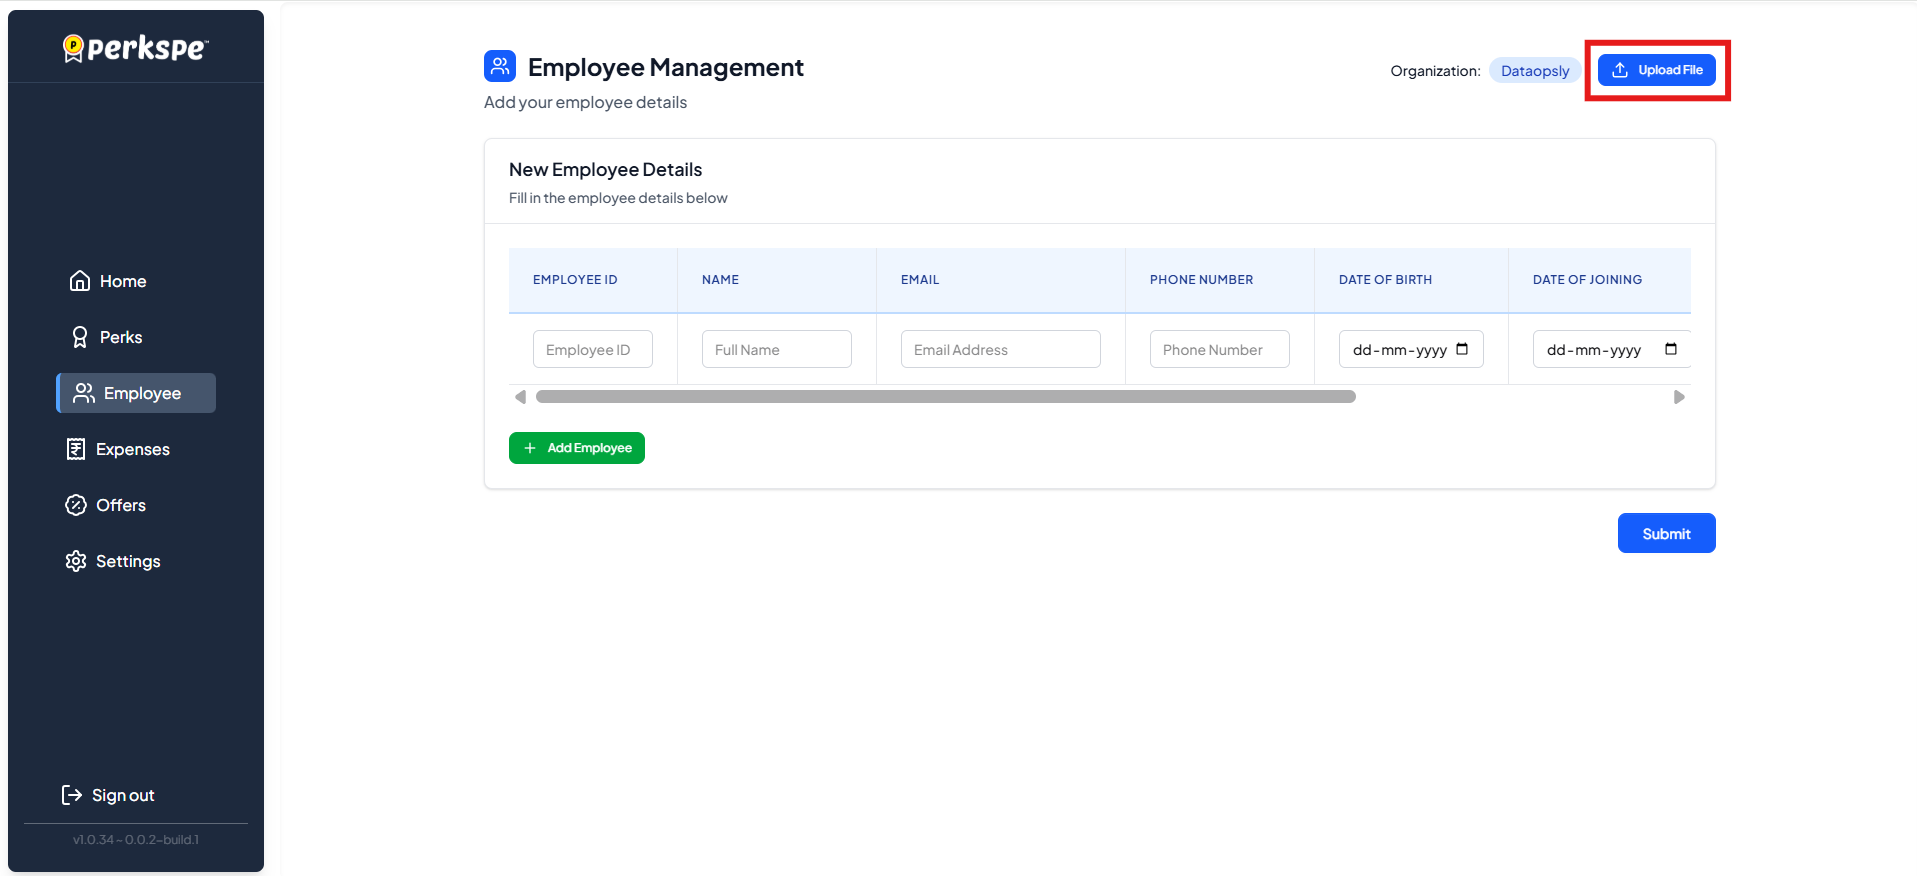
Method B: Upload File (Bulk Import)
Step 1: Click Upload File
On the Employee Management screen, click Upload File (top right).
Step 2: Download Sample CSV (Optional)
Click Download Sample CSV to get the correct file format.
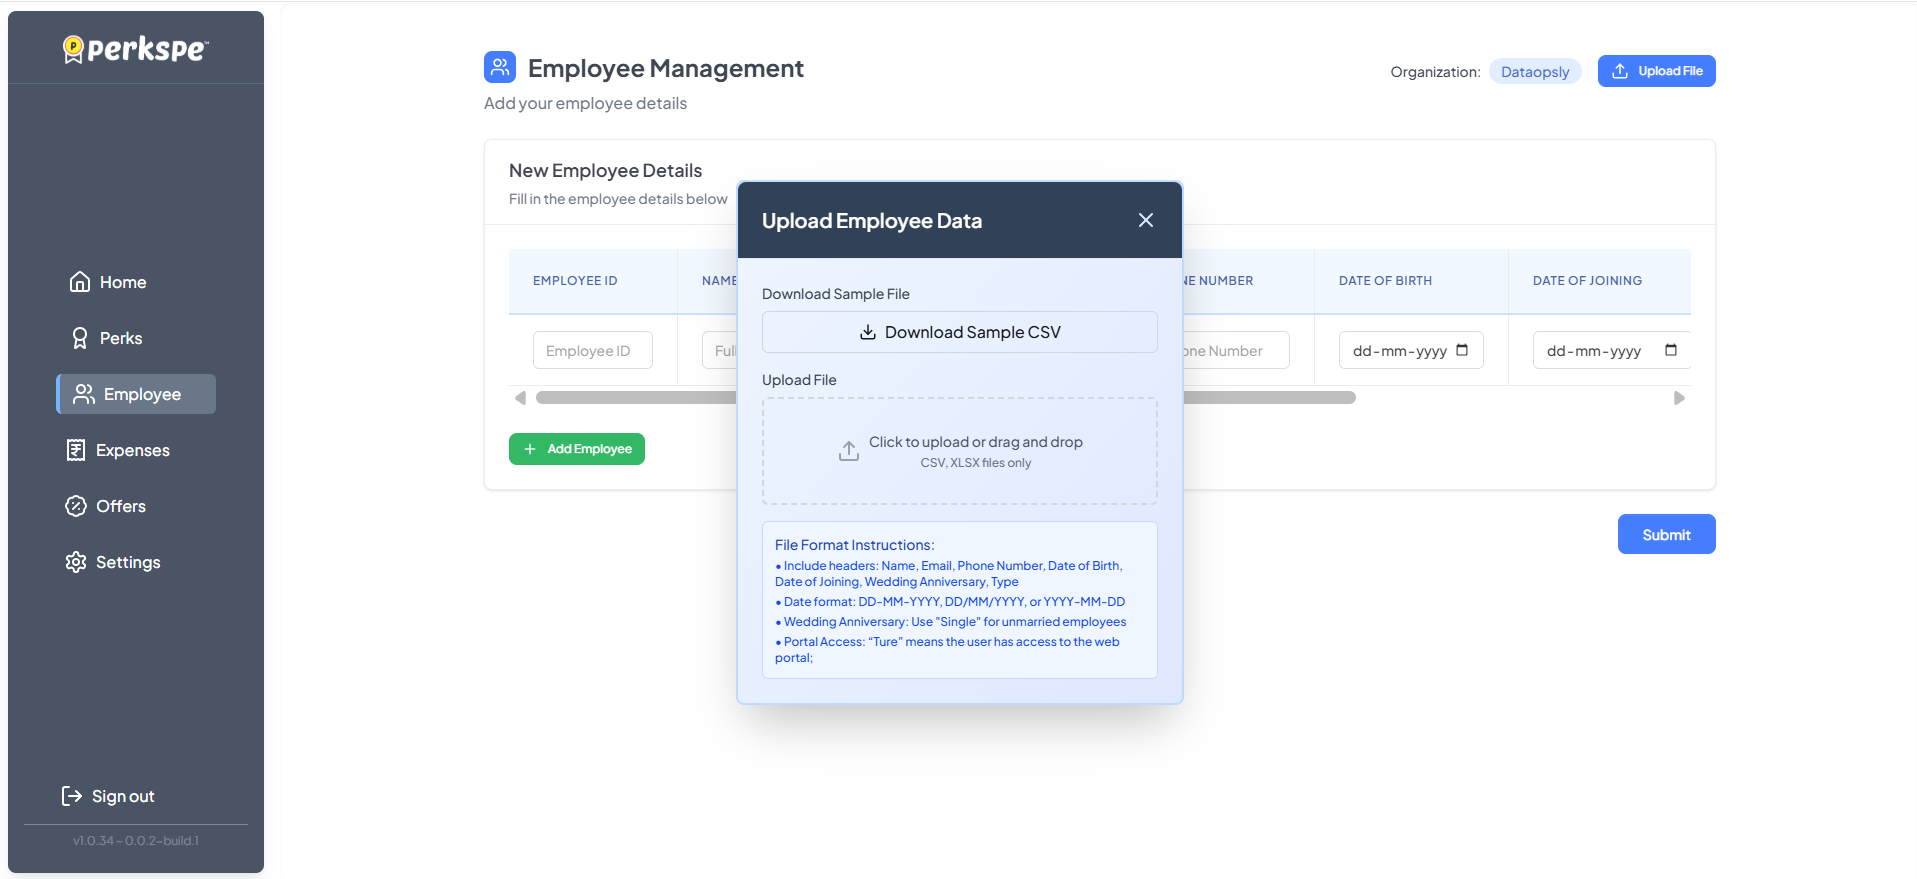

Step 3: Prepare Your File
Your CSV or XLSX file must have these columns:
| Column | Required | Notes |
|---|---|---|
| Name | ✅ | Full name |
| ✅ | Work email | |
| Phone Number | ✅ | Mobile number |
| Date of Birth | ✅ | DD-MM-YYYY, DD/MM/YYYY, or YYYY-MM-DD |
| Date of Joining | ✅ | DD-MM-YYYY, DD/MM/YYYY, or YYYY-MM-DD |
| PAN Number | ✅ | PAN Number |
| Wedding Anniversary | Optional | For anniversary perks |
| Type | ✅ | Employee type |
| Portal Access | ✅ | Set to "True" for web portal access |
Step 4: Upload & Submit
- Drag and drop your file, or click to browse
- Review the imported data
- Click Submit
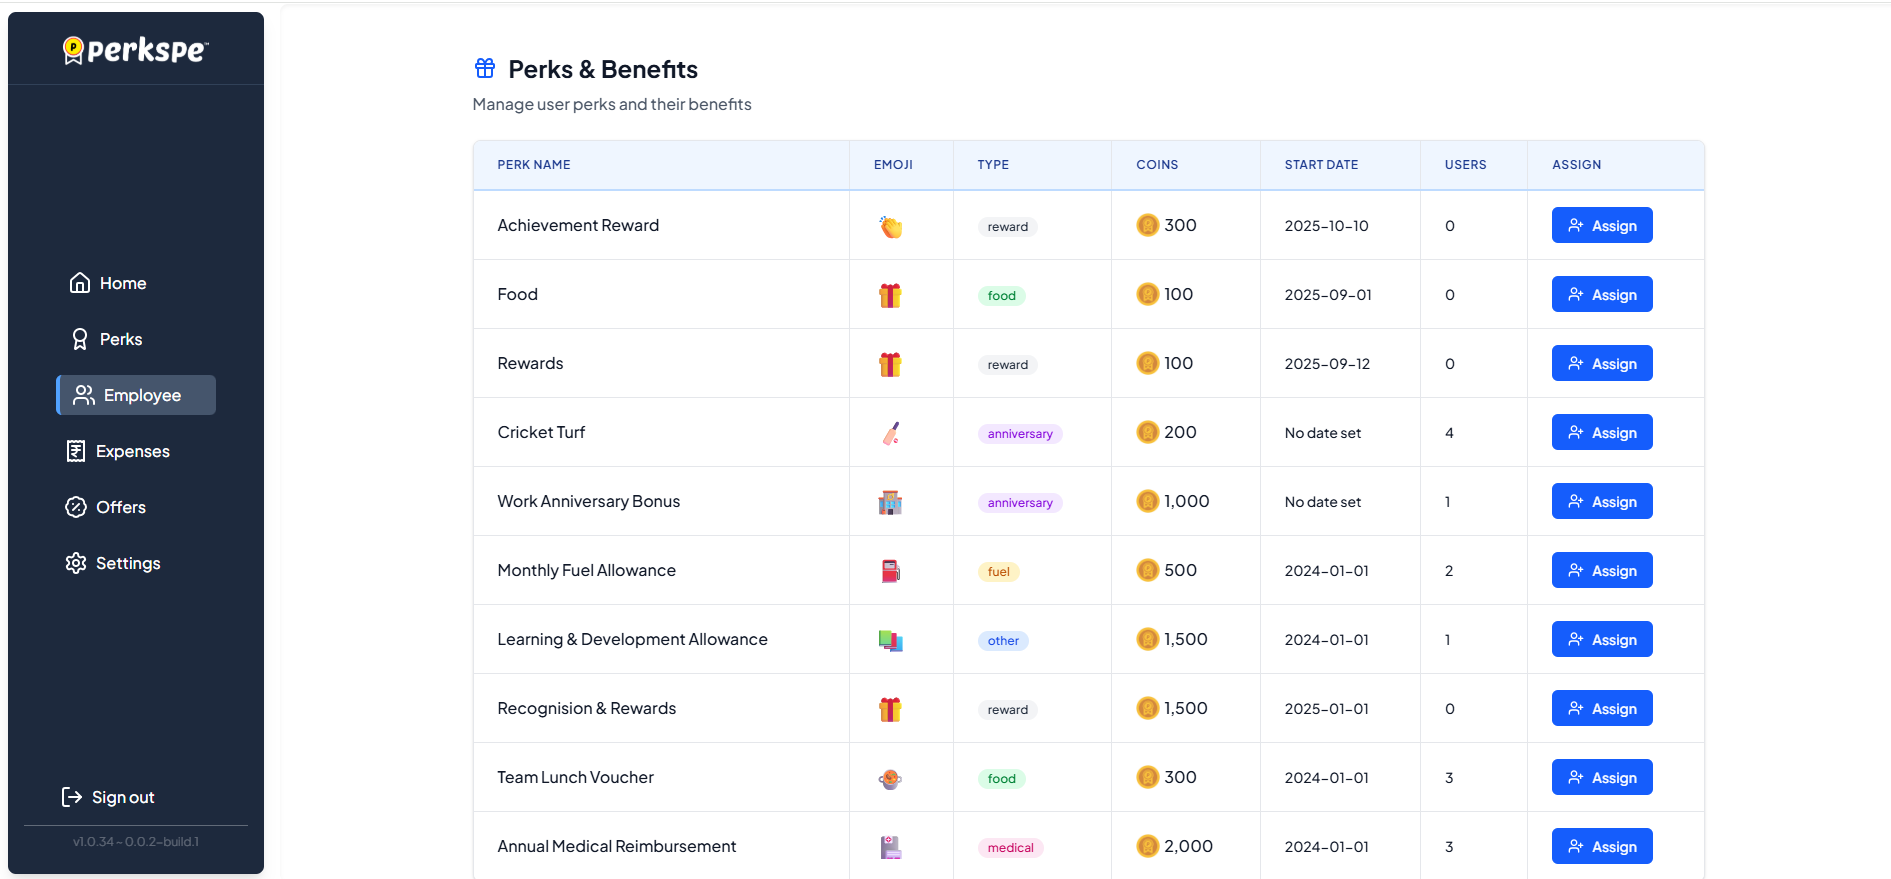
After Adding: Assign Perks
Once employees are added, you can immediately assign perks to them.
Step 1: Click Assign
Click the Assign button next to the perk.
Step 2: Select Employees
A popup appears. You can:
- Use the search bar to find specific employees
- Check individual employees to select them
- Use Select All to choose everyone
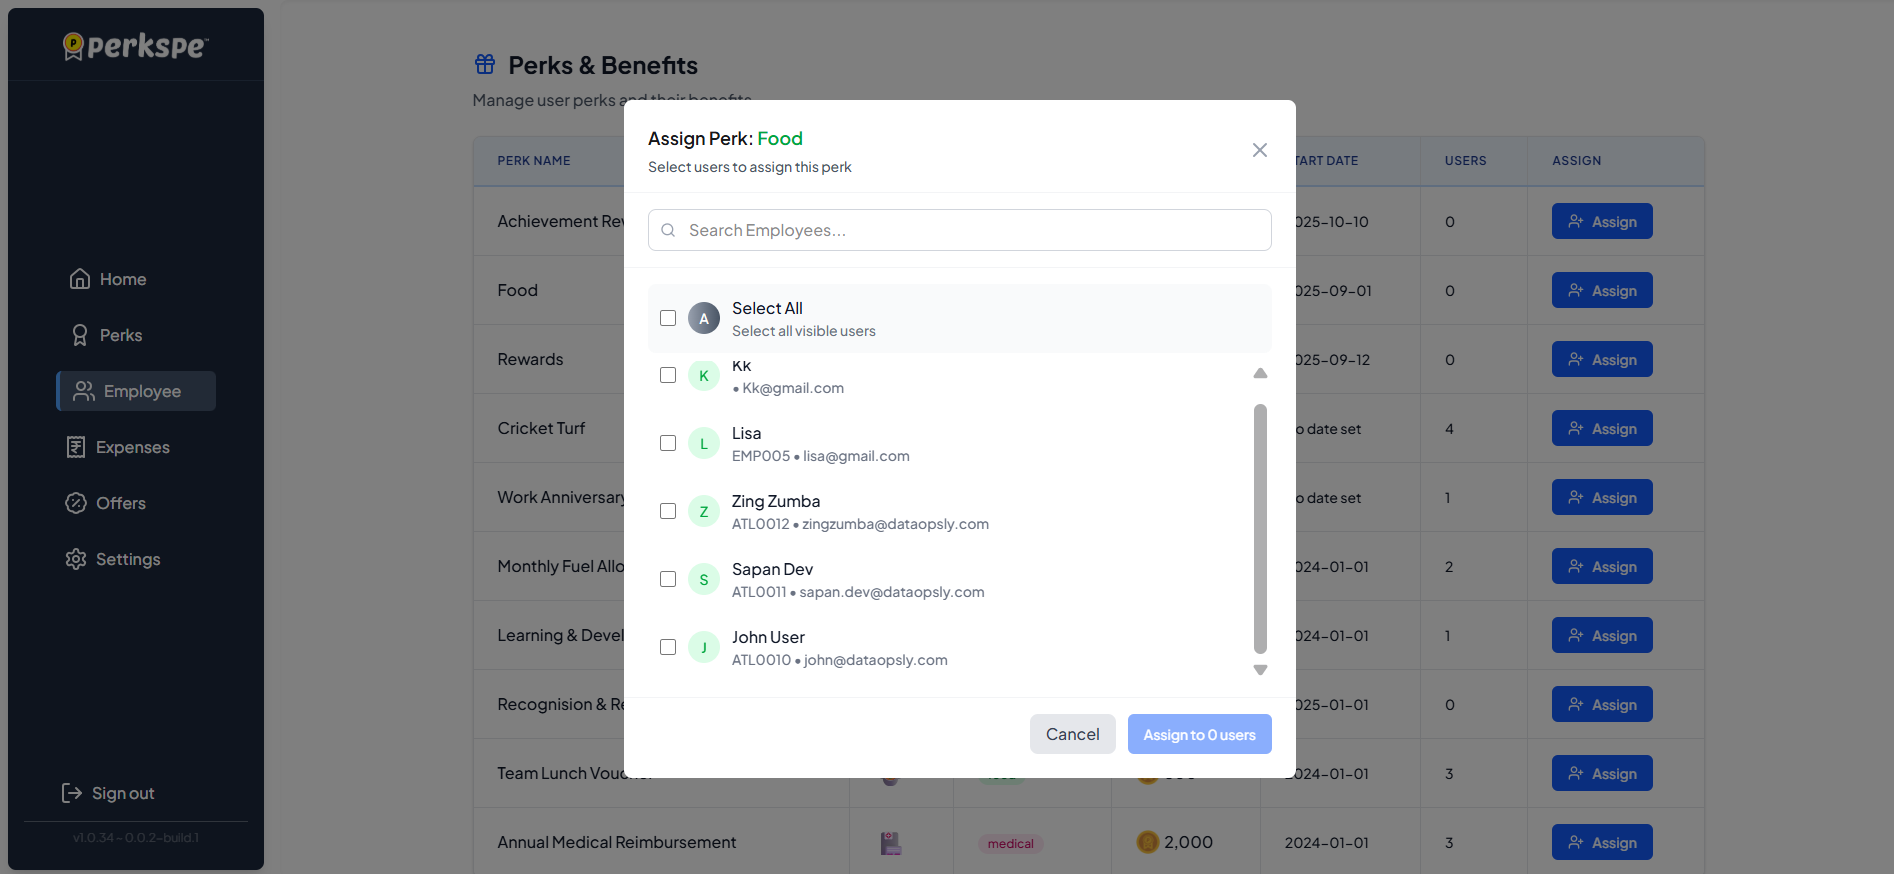
Step 3: Confirm Assignment
Click Assign & Allocate to complete.
Scroll down and click Submit to finish.

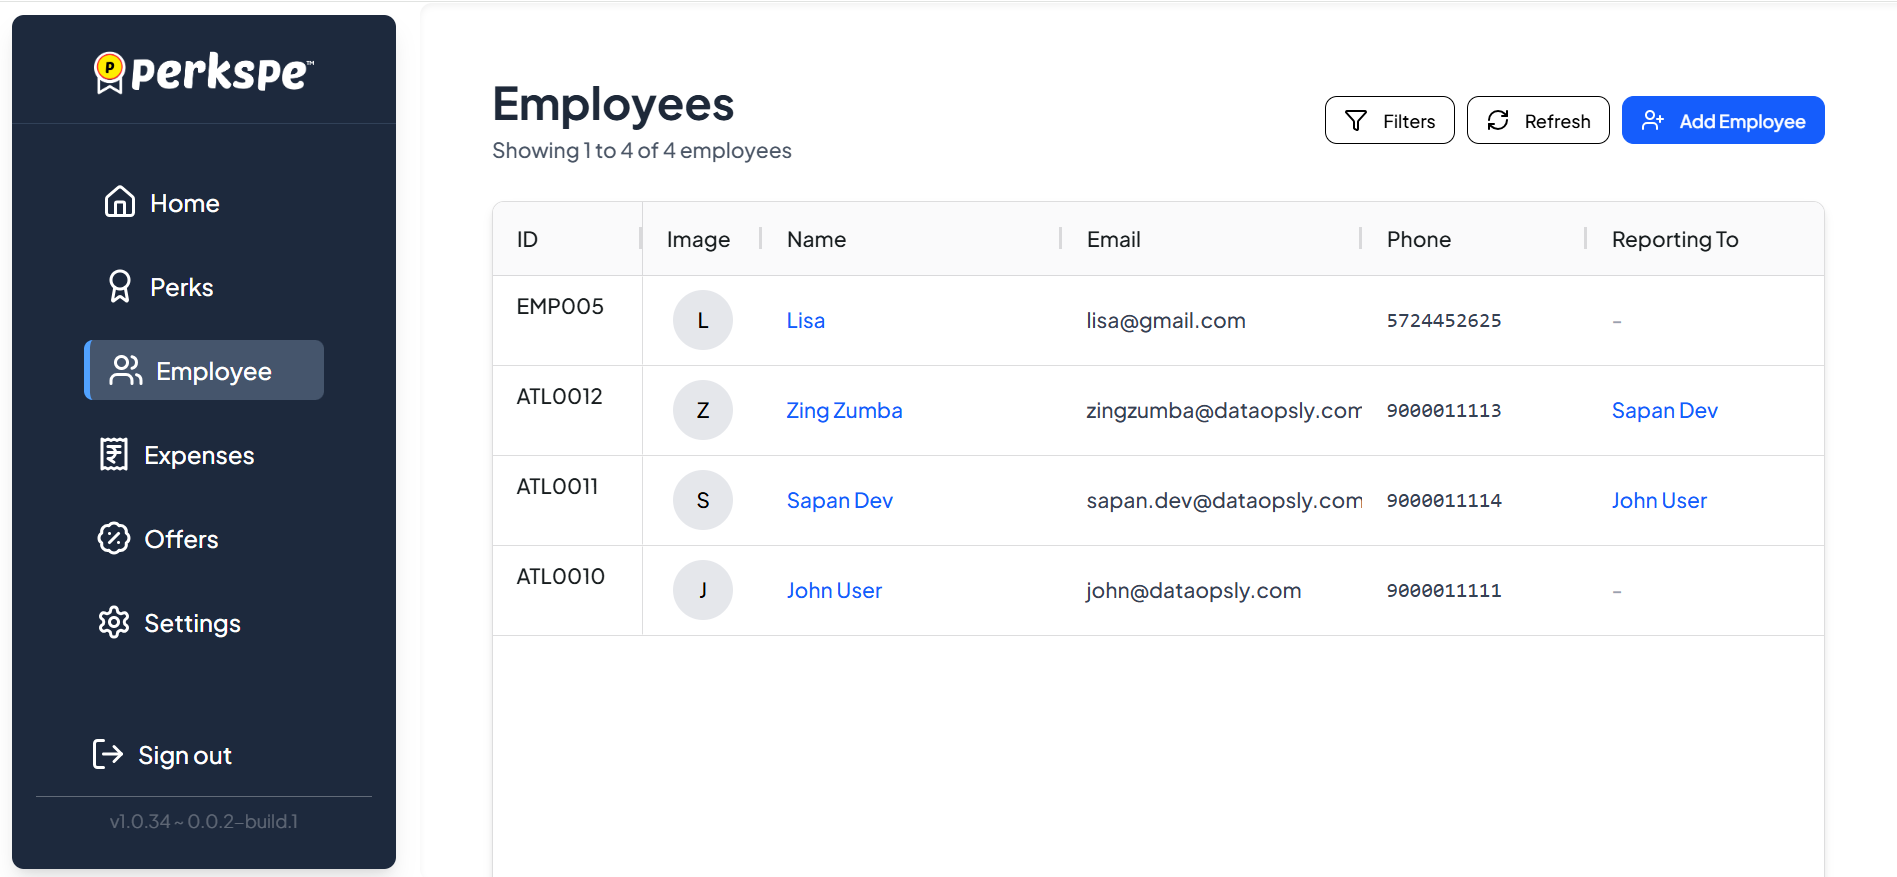
View Employee List
The main Employees screen shows all employees in your organization.
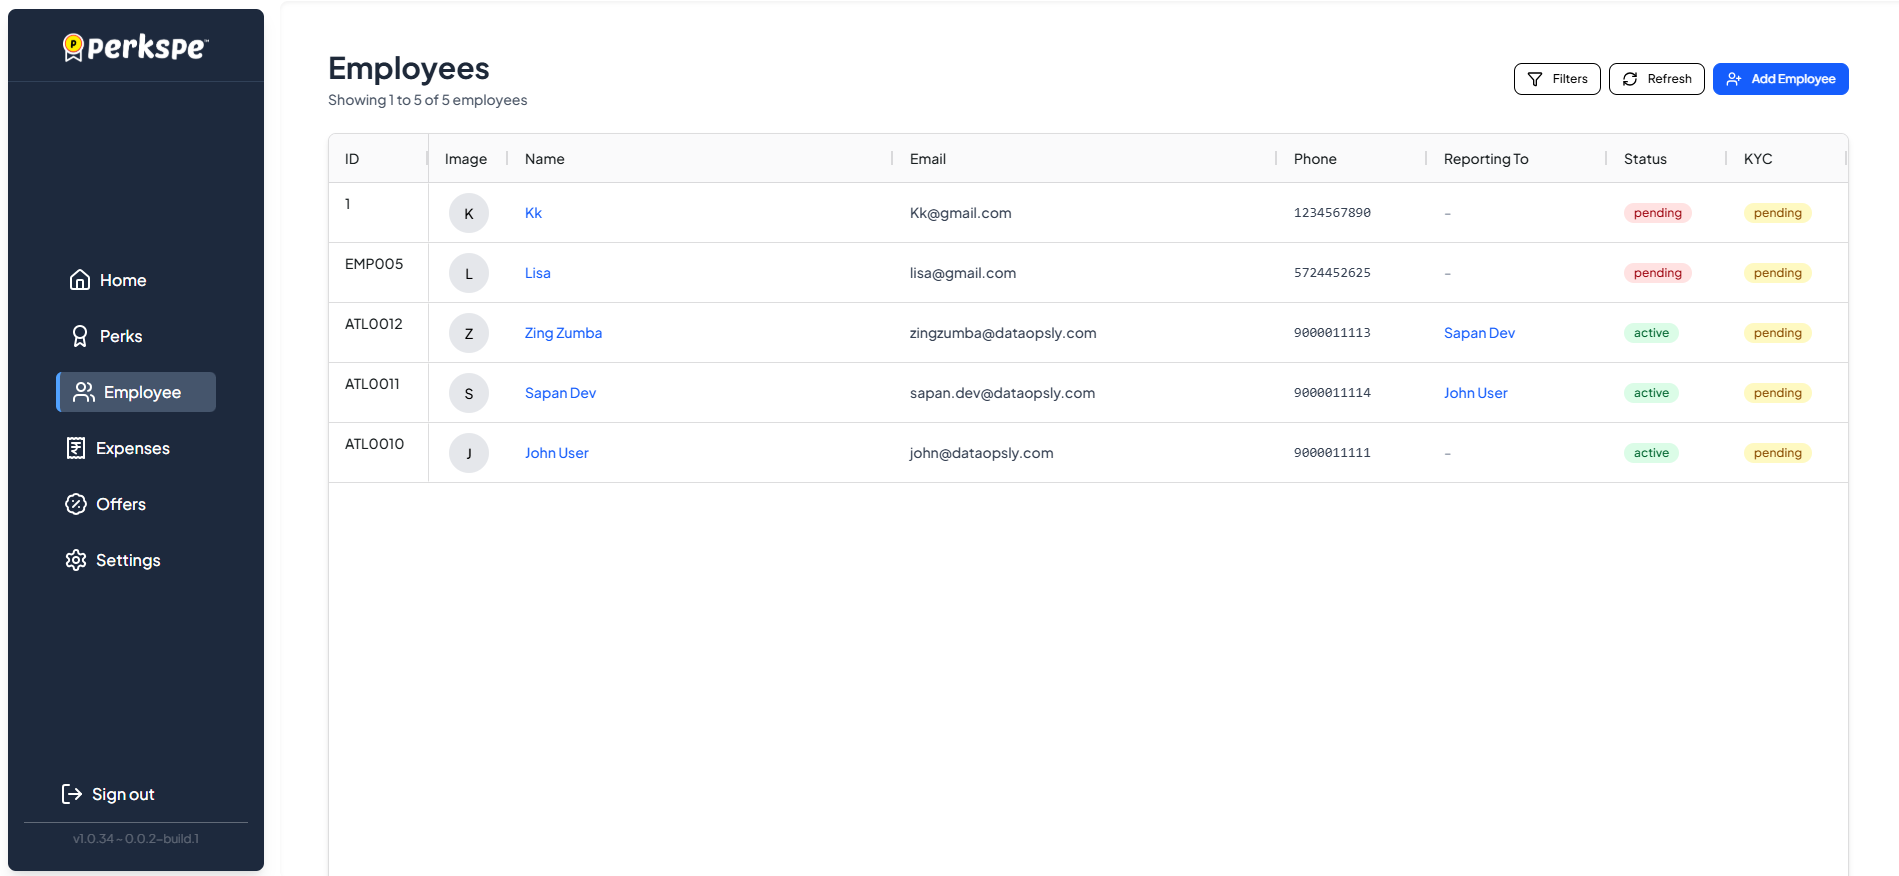
You can see:
- Employee name and contact info
- Current status (Active / Inactive / Closed)
- Assigned perks and roles
Quick Summary
| Task | Steps |
|---|---|
| Add one employee | Employees → Add Employee → Fill details → Submit |
| Add many employees | Employees → Upload File → Upload CSV/XLSX → Submit |
| Assign perks after adding | Click Assign → Select employees → Assign & Allocate |
Editing Employee Details
You can modify an employee's personal information after they have been added to the system.
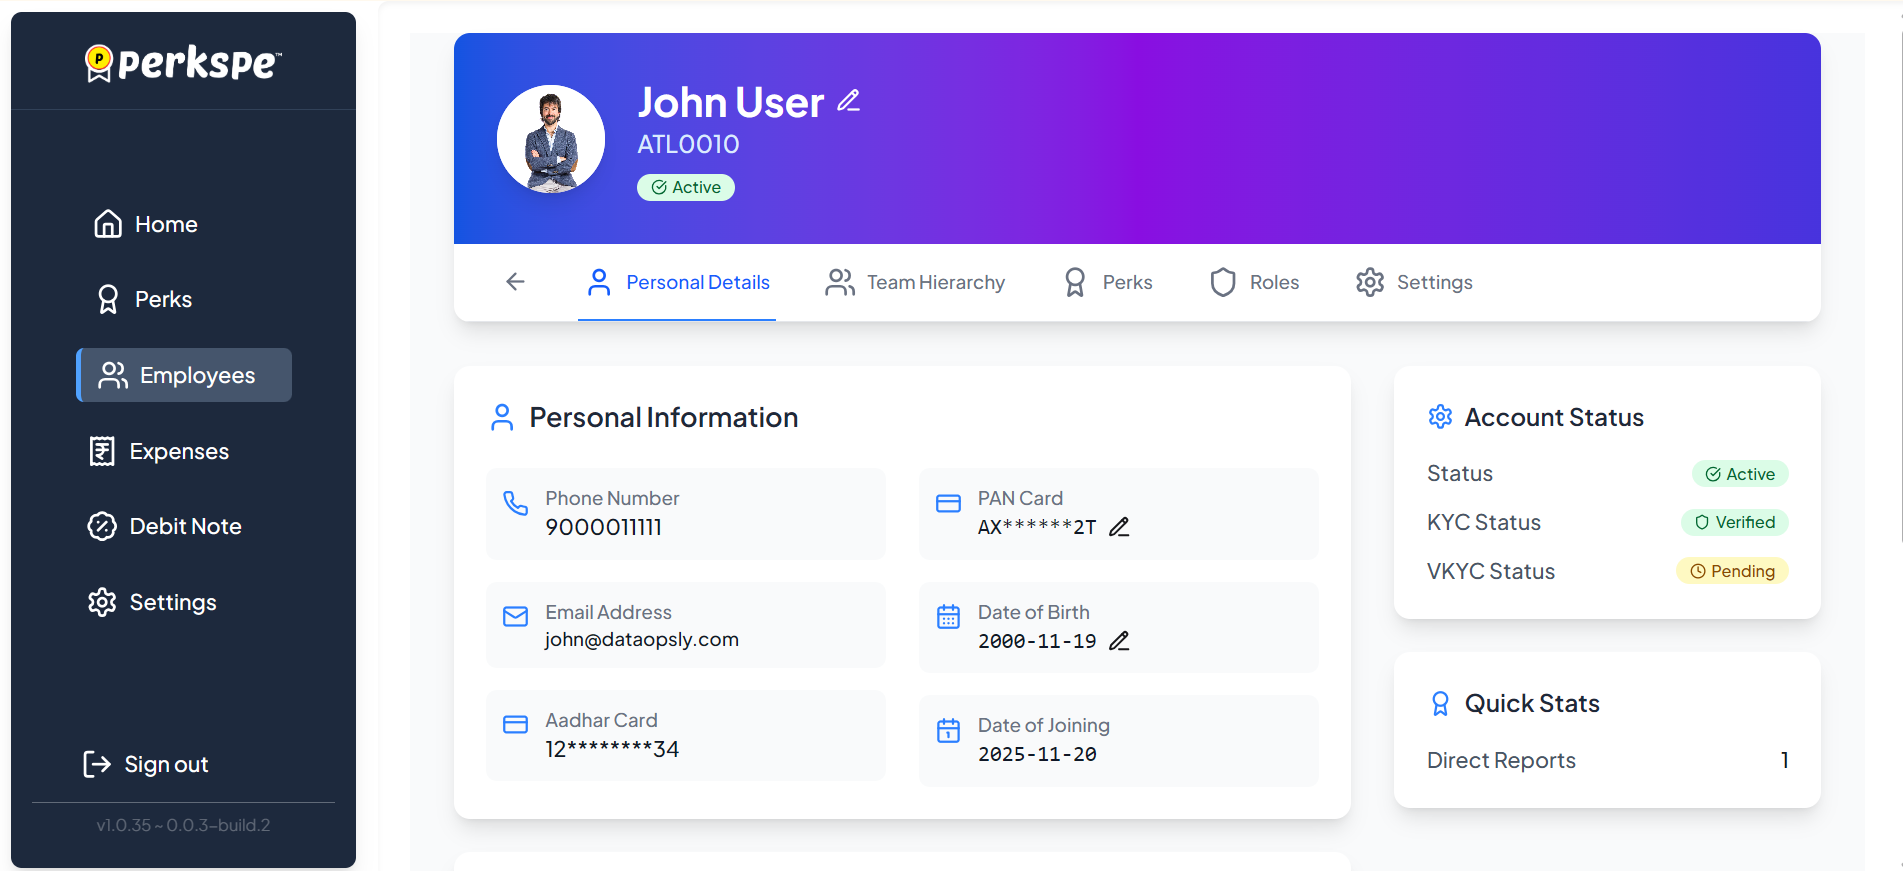
How to Edit:
- Navigate to the Employees list and select the employee.
- In the Personal Details tab, look for the edit icon (✎) next to the fields.
You can edit the following fields:
| Field | Description |
|---|---|
| Full Name | Click the edit icon next to the employee's name in the header to update. |
| PAN Card | Click the edit icon next to the PAN number to modify tax details. |
| Date of Birth | Click the edit icon next to the birth date to correct age information. |
Some fields like Date of Joining and Aadhar Card cannot be edited.